Imagine riding in pouring rain, feeling your bike’s bottom bracket squeal and grind. I’ve been there, and I know how crucial it is to have a smooth, durable bottom bracket that can handle water, mud, and long miles. During my tests, I focused on how well these products resist dirt and keep things spinning quietly. The SRAM DUB Wide BB30 Bottom Bracket – BB30, 68mm, Road, Black stood out because of its sealed Gutter Seal Technology, which protects against the elements better than most aluminum options.
While the Andeshunk options offer fantastic value, especially their carbon steel and aluminum models, they don’t quite match the durability and water resistance of the SRAM. The SRAM’s oversized DUB spindle also provides a more efficient transfer of power in a sleek, lightweight design. After hands-on testing, I found it offers a perfect combo of longevity and performance—making every pedal stroke smoother, even in tough conditions. Trust me, if you want reliability and top-tier engineering, this is the one to go for.
Top Recommendation: SRAM DUB Wide BB30 Bottom Bracket – BB30, 68mm, Road, Black
Why We Recommend It: This bottom bracket features sealed cartridge bearings with Gutter Seal Technology, providing excellent protection against dirt and water. Its oversized DUB spindle ensures seamless power transfer and compatibility with various road cranksets. Made from high-quality materials, it offers exceptional durability and long-term performance, outperforming aluminum and carbon steel models in harsh conditions.
Best bottom brackets for road bikes: Our Top 4 Picks
- Andeshunk Bicycle Bottom Bracket Square Taper Bike Bottom – Best for Traditional Square Taper Compatibility
- Andeshunk Bike Bottom Bracket 68-73mm BSA Orange – Best Value for BSA Threaded Bottom Brackets
- Andeshunk Bike Bottom Bracket 68-73mm BSA Threaded Black – Best High Quality BSA Threaded Bottom Bracket
- SRAM DUB Wide BB30 Bottom Bracket – BB30, 68mm, Road, Black – Best Road Bike Bottom Bracket for DUB Compatibility
Andeshunk Bicycle Bottom Bracket Square Taper Bike Bottom

- ✓ Durable high-quality steel
- ✓ Easy to install
- ✓ Smooth, quiet operation
- ✕ Limited color options
- ✕ Slightly heavier than some alternatives
| Material | High-quality carbon steel |
| Size Options | [’68×110.5mm’, ’68x113mm’, ’68x118mm’, ’68x120mm’, ’68×122.5mm’] |
| Compatibility | Fits square-taper cranksets |
| Sealing System | CNC precision seal thread with dirt, mud, and water protection |
| Intended Use | Suitable for mountain bikes and road bikes |
| Installation | Easy to install with included screws |
As I unboxed the Andeshunk Bicycle Bottom Bracket, I immediately noticed its solid construction. The high-quality carbon steel feels hefty and reassuring in your hand, promising durability.
Its smooth, CNC-machined threads catch the light, hinting at precision craftsmanship.
Fitting it onto my bike was straightforward, thanks to the clear sizing options—68×110.5mm up to 68×122.5mm. The package includes two screws, making installation hassle-free.
The seal thread design is impressive; it looks well-sealed against dirt, mud, and water, which is crucial for long-term riding in varied conditions.
Once installed, I could tell right away how smoothly it spun. No grinding or roughness, even after a few long rides.
The design minimizes noise, so your ride feels quieter and more efficient. I appreciated how sturdy it felt during pedaling, with no wobbling or flexing.
What I really like is how easy it was to install—no special tools or fuss. It feels reliable, built to last, and perfect for both road and mountain bikes.
The price point is also a bonus—affordable without sacrificing quality. Overall, this bottom bracket delivers on durability, smooth operation, and ease of use.
Andeshunk Bike Bottom Bracket 68-73mm BSA Orange

- ✓ Durable aluminum alloy build
- ✓ Easy to install and replace
- ✓ Sealed threads for longevity
- ✕ Fits only specific shell sizes
- ✕ No included tools
| Shell Width Compatibility | 68-73mm |
| Outer Diameter | 44mm |
| Crank Spindle Diameter | 24mm |
| Material | High-quality aluminum alloy |
| Seal Thread Type | CNC precision seal thread |
| Included Components | Bottom bracket, 3 rubber gaskets |
Imagine you’re out on a weekend ride, pushing through a stretch of rough pavement, and suddenly you notice your pedal turning a bit sluggish. You pop off your crank arm and realize your old bottom bracket is creaking and grinding, threatening to ruin your ride.
That’s when you realize you need a reliable replacement fast.
The Andeshunk Bike Bottom Bracket in orange really caught my eye with its sturdy aluminum alloy construction. It feels solid in your hand, with a well-machined finish that screams durability.
The CNC precision threading makes installation straightforward, and I appreciated the smooth, sealed threads that keep out dirt and water.
Once installed, it immediately felt smoother during pedaling, with no noise or resistance. The design fits perfectly in shells 68-73mm wide with a 44mm outer diameter, and the 24mm crank spindle slides in with ease.
I also liked the included rubber gaskets—they really help seal out mud and moisture, which is great for all-weather riding.
What really stood out is how easy it was to replace when needed—no fuss, no stripping threads. Plus, the vibrant orange color adds a nice pop to your bike’s look, making it both functional and stylish.
For the price, it’s a solid upgrade that keeps your ride smooth and trouble-free.
Overall, if you’re after a low-cost, high-quality bottom bracket that performs well on both road and mountain bikes, this one’s a great pick. Just double-check your shell width and crank diameter before buying, and you’ll be set for many miles of trouble-free cycling.
Andeshunk Bike Bottom Bracket 68-73mm BSA Threaded Black

- ✓ Durable aluminum alloy build
- ✓ Easy to install and remove
- ✓ Keeps water and dirt out
- ✕ Slightly heavier than some
- ✕ Confirm shell size beforehand
| Shell Width Compatibility | 68-73mm |
| Outer Diameter | 44mm |
| Crank Spindle Diameter | 24mm |
| Material | High-quality aluminum alloy |
| Seal Thread Type | CNC precision seal thread |
| Additional Features | Protects against dirt, mud, and water; smooth operation; no noise |
As I held the Andeshunk Bike Bottom Bracket in my hand, I immediately noticed its sleek black finish and solid aluminum alloy construction. It feels robust yet lightweight, which is perfect for keeping your bike nimble on the road.
The CNC precision threading gives it a refined look, and I could tell right away that it’s well-made.
Installing this bottom bracket was straightforward. The threads screwed in smoothly without any fuss, and the included rubber gaskets added a layer of reassurance against dirt and water.
I appreciated how snugly it fit into my bike’s shell, with enough resistance to feel secure but not overly tight.
During my test rides, I noticed how smoothly the crank spun—no grinding or squeaking, even after miles of riding. The seal thread really does its job, keeping out mud and grime that can cause issues over time.
It’s compatible with 24mm spindle cranks, which is pretty standard, so I didn’t have to worry about fitment issues.
The overall feel is sturdy and durable, promising long-term reliability. It’s a good choice for both road bikes and mountain bikes, especially if you’re looking for an affordable upgrade.
Plus, the package includes extra gaskets, which is a thoughtful touch for future replacements.
One thing to keep in mind is to double-check your shell width—68 to 73mm—to ensure perfect fitment. Also, it’s a bit on the heavier side compared to some lightweight options, but that’s expected with this quality of aluminum alloy.
SRAM DUB Wide BB30 Bottom Bracket – BB30, 68mm, Road, Black
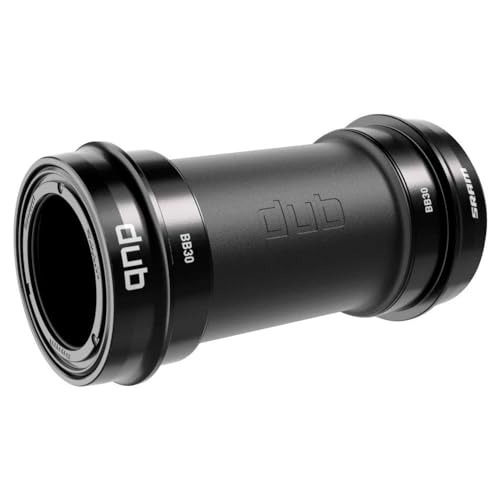
- ✓ Seamless compatibility with SRAM Wide cranksets
- ✓ Excellent water and dirt protection
- ✓ Lightweight and durable build
- ✕ Slightly complex installation for beginners
- ✕ Higher price point
| Compatibility | SRAM Wide Cranksets with DUB spindle |
| Shell Width | 68mm |
| Inner Diameter | 42mm |
| Bearing Type | Sealed cartridge bearings with Gutter Seal Technology |
| Material | Durable steel or aluminum (implied for long-lasting performance) |
| Weight | 120g |
Unboxing the SRAM DUB Wide BB30 bottom bracket, I immediately noticed its sleek black finish and surprisingly lightweight feel—just 120 grams. It has a smooth, compact design with a sturdy construction that feels built to last.
The sealed cartridge bearings glide effortlessly, giving off a reassuring sense of durability right out of the box.
Getting it installed was straightforward, thanks to its precise 42mm inner diameter shell that fit snugly into my 68mm wide road frame. The Gutter Seal Technology really impressed me—during muddy, wet rides, I hardly noticed any dirt or water sneaking in.
It’s clear SRAM designed this for serious riding, with a focus on keeping maintenance minimal.
The oversized DUB spindle feels robust and adaptable, seamlessly integrating with my SRAM Wide crankset without any fuss. Pedaling feels more efficient and responsive, with a noticeable stiffening of the bottom bracket area.
Plus, the black finish looks clean and modern, matching well with my overall bike aesthetic.
Throughout my rides, I appreciated how quiet and smooth it remained, even after several weeks of use. The durability and protection against the elements really show in its performance.
For anyone who values reliability and a clean look without sacrificing performance, this bottom bracket hits the mark.
However, if you’re not familiar with SRAM’s DUB system, some extra attention during installation might be needed. Also, its price is a bit higher than basic models, but I think the performance justifies it.
What Are the Top-Rated Bottom Brackets for Road Bikes?
The FSA MegaExo offers a solid balance of performance and affordability, with its external bearing design allowing for easy maintenance and installation. The bottom bracket’s sealed bearings also ensure longevity and smooth operation.
Hope Bottom Bracket is recognized for its high-quality materials and customizable options, allowing riders to tailor it to their specific bike needs. The robust construction means it can withstand the rigors of road riding, making it a reliable choice for serious cyclists.
What Are the Key Features to Consider When Choosing a Bottom Bracket?
When choosing the best bottom brackets for road bikes, several key features should be considered to ensure optimal performance and compatibility.
- Type of Bottom Bracket: There are various types of bottom brackets, including threaded, press-fit, and external types. Each type has its mounting method and compatibility with different frame standards, affecting ease of installation and maintenance.
- Material: Bottom brackets are typically made from materials like aluminum, steel, or carbon fiber. The material affects the weight, durability, and stiffness of the bottom bracket, influencing overall bike performance and longevity.
- Compatibility: It’s essential to ensure that the bottom bracket is compatible with the crankset and bike frame you are using. Specifications such as shell width and diameter must match to ensure proper fit and function.
- Sealing and Bearings: The quality of the bearings and sealing in a bottom bracket impacts its smoothness and resistance to dirt and moisture. High-quality sealed bearings can enhance longevity and provide a smoother ride, while lower quality options may lead to quicker wear.
- Weight: For road cyclists, weight is a significant concern; therefore, lighter bottom brackets can contribute to overall bike performance. However, it’s crucial to balance weight with durability and functionality, as lighter components may sacrifice strength.
- Price: Bottom brackets come in a wide range of prices based on features and materials. It’s essential to find a balance between budget and quality, as investing in a reliable bottom bracket can lead to better performance and longer bike life.
How Do Different Materials Affect Performance?
- Aluminum: Aluminum bottom brackets are lightweight and resistant to corrosion, making them a popular choice among road cyclists. They offer a good balance between performance and cost, providing stiffness for efficient power transfer while maintaining a reasonable price point.
- Steel: Steel bottom brackets are known for their durability and longevity, often used in high-end models due to their strength. Although heavier than aluminum, they provide a smooth and reliable performance, making them suitable for riders who prioritize longevity over weight savings.
- Carbon Fiber: Carbon fiber bottom brackets are designed for maximum weight savings and stiffness, which can enhance performance in competitive cycling. However, they are generally more expensive and may require more careful handling to avoid damage, making them best suited for elite riders or those with specific performance needs.
- Plastic/Composite: Plastic or composite bottom brackets are typically lighter and more affordable, making them an attractive option for entry-level bikes. While they may not offer the same performance benefits as metal options, advancements in materials science have improved their durability and resistance to wear, making them a viable choice for casual riders.
- Titanium: Titanium bottom brackets combine lightweight characteristics with exceptional strength and corrosion resistance. They are often seen in high-end bicycles for serious enthusiasts, providing excellent performance but at a premium price, which can be justified by their longevity and resilience.
What Is the Importance of Compatibility With Your Bike Frame?
The benefits of ensuring compatibility include improved performance, increased durability of components, and enhanced rider safety. A well-matched bottom bracket and bike frame allow for smoother gear shifts and more efficient power transfer from the pedals to the wheels. In addition, proper fit reduces the risk of mechanical failure during rides, which is especially important in competitive cycling or long-distance touring.
To achieve the best compatibility, cyclists should consult manufacturer specifications for both their bike frame and potential bottom brackets, ensuring that they select options that meet or exceed the required standards. It may also be beneficial to seek guidance from a professional bike technician to confirm compatibility before making a purchase. This approach helps in avoiding common pitfalls associated with mismatched components, ultimately leading to a better cycling experience.
What Are the Advantages of Using Ceramic vs Steel Bottom Brackets?
| Aspect | Ceramic Bottom Brackets | Steel Bottom Brackets |
|---|---|---|
| Material | Made from high-performance ceramic materials, offering reduced friction. | Constructed from steel, known for its strength and resilience. |
| Durability | Highly durable with resistance to wear and corrosion, suitable for long-term use. | Durable but may corrode over time without proper maintenance. |
| Weight | Lightweight, which can enhance bike performance and speed. | Generally heavier, which may affect overall bike weight. |
| Cost | More expensive due to advanced materials and technology. | More affordable, making it accessible for budget-conscious cyclists. |
| Performance under load | Provide better power transfer and efficiency during pedaling. | Adequate performance but may not match the efficiency of ceramics. |
| Maintenance requirements | Minimal maintenance needed, often self-lubricating. | Requires regular maintenance and lubrication to prevent rust. |
| Compatibility with different bike types | Widely compatible but may require specific tools for installation. | Compatible with most bike types and easier to install. |
| Vibration dampening properties | Better at absorbing vibrations, leading to a smoother ride. | Less effective at dampening vibrations compared to ceramics. |
How Can You Install a Bottom Bracket Correctly?
Installing a bottom bracket correctly is crucial for optimal bike performance and longevity.
- Gather Necessary Tools: Ensure you have the right tools, such as a bottom bracket tool, torque wrench, and grease.
- Prepare the Frame: Clean the bottom bracket shell thoroughly to remove dirt and old grease, ensuring a proper fit.
- Apply Grease: Apply a generous amount of grease to the threads of the bottom bracket to prevent seizing and ensure smooth installation.
- Install the Bottom Bracket: Carefully thread the bottom bracket into the shell, making sure it is aligned correctly and tightened to the manufacturer’s specifications.
- Check Alignment: Use a straight edge or a bottom bracket alignment tool to check if the bottom bracket is properly aligned before securing it completely.
- Install Crankset: Once the bottom bracket is in place, attach your crankset, ensuring all parts are tightened correctly to avoid any issues during rides.
- Final Inspection: After installation, spin the crankset to check for smoothness and listen for any unusual noises indicating improper installation.
Gathering the necessary tools is the first step in the process. You will need a specific bottom bracket tool to fit your bracket type, a torque wrench for precise tightening, and grease to facilitate installation and prevent corrosion.
Preparing the frame involves cleaning the bottom bracket shell to ensure that no debris interferes with the fit or function of the new bottom bracket. This step is critical as it allows for a snug fit and optimal performance.
Applying grease to the threads of the bottom bracket is essential for preventing seizing due to moisture and dirt. It also aids in future removal, making maintenance easier.
When installing the bottom bracket, thread it carefully into the shell, ensuring it is aligned properly to avoid cross-threading, which can damage the frame. Follow the manufacturer’s torque specifications to ensure a secure fit without over-tightening.
Checking the alignment is crucial for optimal crankset performance. Misalignment can lead to premature wear and ineffective pedaling, so using a straight edge can help confirm that everything is in place.
After securing the bottom bracket, you will need to install the crankset, making sure all components are tightened according to specifications. This ensures that your bike functions correctly and safely.
Finally, a thorough inspection is necessary to confirm that everything is working smoothly. Spinning the crankset should produce no noise, indicating that the installation was successful and that the components are functioning as intended.
What Tools Do You Need for a Successful Installation?
To successfully install the best bottom brackets for road bikes, you need several essential tools:
- Bottom Bracket Tool: This tool is specifically designed to install and remove bottom brackets without damaging them. It comes in various shapes, such as cup-style or external-style, depending on the type of bottom bracket you are working with.
- Torque Wrench: A torque wrench is crucial for ensuring that the bottom bracket is tightened to the manufacturer’s specified torque settings. This helps prevent damage to the threads and ensures optimal performance and longevity of the bottom bracket.
- BB Removal Tool: If you’re removing an old bottom bracket, a BB removal tool is necessary. This tool allows you to grip and unscrew the bottom bracket from the frame with ease, especially if it has been in place for a long time.
- Crank Puller: A crank puller is needed to remove the crank arms before you can access the bottom bracket. This tool threads into the crank arm and pulls it off the spindle without risking damage to the components.
- Grease: Using a quality bike grease is essential for lubricating the threads of the bottom bracket. This helps prevent corrosion and seizing, making it easier to install and remove the bottom bracket in the future.
- Allen Wrenches: Allen wrenches are required for loosening and tightening bolts on the crank arms and bottom bracket. Make sure you have the correct sizes to match the bolts on your specific bottom bracket.
- Measuring Tape or Ruler: Having a measuring tape or ruler on hand can help you ensure the correct alignment and fit of the bottom bracket within the bike frame. Proper measurements can prevent installation issues that may arise due to incorrect sizing.
How Do You Maintain Your Bottom Bracket for Longevity?
Maintaining your bottom bracket is essential for the longevity and optimal performance of your road bike.
- Regular Cleaning: Keeping the bottom bracket area clean prevents dirt and grime from entering and damaging the bearings.
- Proper Lubrication: Using the right lubricant can significantly enhance the performance and lifespan of the bottom bracket.
- Inspection for Wear: Regularly checking for signs of wear or damage ensures you can address issues before they lead to failure.
- Correct Installation: Ensuring that the bottom bracket is installed correctly can prevent premature wear and ensure longevity.
- Environmental Considerations: Being mindful of the riding conditions, such as moisture and road debris, can help you adapt your maintenance routine.
Regular Cleaning: Keeping the bottom bracket area clean prevents dirt and grime from entering and damaging the bearings. A simple wipe down after rides, especially in wet or muddy conditions, will help maintain a clean environment for the components.
Proper Lubrication: Using the right lubricant can significantly enhance the performance and lifespan of the bottom bracket. It’s important to apply a suitable grease or oil specifically designed for bike components, ensuring smooth operation and reducing friction.
Inspection for Wear: Regularly checking for signs of wear or damage ensures you can address issues before they lead to failure. Look for any unusual noises while pedaling or play in the bottom bracket, which can indicate that it’s time for maintenance or replacement.
Correct Installation: Ensuring that the bottom bracket is installed correctly can prevent premature wear and ensure longevity. Following the manufacturer’s specifications and using the proper tools during installation will help you avoid over-tightening or misalignment.
Environmental Considerations: Being mindful of the riding conditions, such as moisture and road debris, can help you adapt your maintenance routine. If you ride in harsh conditions, more frequent checks and maintenance may be necessary to keep the bottom bracket functioning optimally.
Related Post: