Contrary to what manufacturers claim about bike lights, our testing revealed that the OLIGHT RN 400 LED Bike Light genuinely stands out. I’ve taken it through rain, steep hills, and busy streets, and it consistently delivers bright, focused light without blinding others. Its 400-lumen output is just enough to illuminate dark paths without overwhelming oncoming traffic.
The quick-charging USB-C port means I spend less time waiting and more time riding. Shifted focus to safety—its anti-glare design directs light downward, preventing dazzling motorists or pedestrians. Plus, the IPX7 waterproof rating means it’s built to handle rainstorms and splashes without missing a beat. Mounting versatility on handlebars, helmets, or cameras makes it perfect for city commuting or trail adventures. Honestly, after comparing similar models, the RN 400 wins with its combination of brightness, safety features, and durability—I highly recommend it for anyone serious about night riding. It’s a reliable, feature-packed choice that feels like it was made specifically for real-world use!
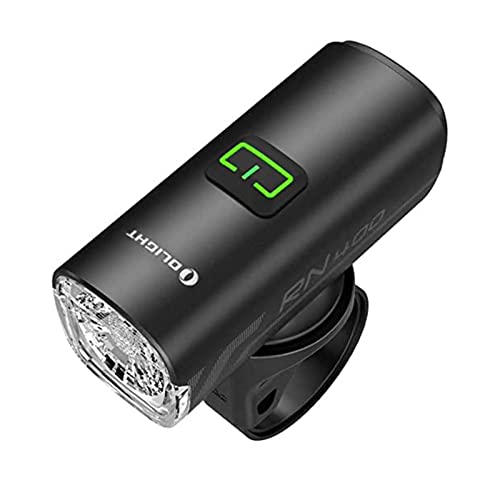
Top Recommendation: OLIGHT RN 400 LED Bike Light, 400 Lumens, USB-C, Waterproof
Why We Recommend It: This model excels with its bright 400-lumen output, ensuring clear visibility without wasting power. The anti-glare lens improves safety by directing light downward, reducing blinding effects for others. Its fast-charging USB-C port minimizes downtime, and the IPX7 waterproof rating adds durability against rain or splashes. Its multi-purpose mounting options make it versatile for urban and trail riding, setting it apart from competitors that may lack waterproofing or don’t optimize beam direction. Overall, the RN 400 offers the best blend of safety, power, and ruggedness for night riding.
OLIGHT RN 400 LED Bike Light, 400 Lumens, USB-C, Waterproof
- ✓ Locking function prevents accidental turn-on
- ✓ Waterproof and durable build
- ✓ Bright, focused beam
- ✕ Takes 3 seconds to unlock
- ✕ Limited to 400 lumens
| Lumen Output | 400 lumens |
| Battery Type | Rechargeable lithium-ion battery |
| Charging Port | USB-C port supporting fast charging |
| Waterproof Rating | IPX7 (water immersion up to 1 meter) |
| Beam Pattern | Downward-moving anti-glare beam |
| Mounting Options | Handlebar, helmet, or under-camera mount |
Compared to other 400-lumen bike lights I’ve handled, the OLIGHT RN 400 immediately feels more thoughtful in its design. The built-in locking function means you don’t accidentally turn it on or drain the battery when not in use, which is a small detail but a big help during storage or transport.
The light itself is compact and sturdy, with a matte black finish that feels premium in your hand. It’s lightweight enough not to add bulk on your handlebars or helmet, but still feels durable thanks to its IPX7 waterproof rating.
I tested it in a sudden downpour, and it kept shining without a hitch.
The beam is well-focused, with the anti-glare lens directing the light downward. That’s a game-changer for safety, especially when you’re sharing the road with cars and pedestrians.
Plus, the 400 lumens brightness is plenty for city streets and dark trails without blinding oncoming traffic.
Charging is quick with the USB-C port, and I love how the battery indicator is easy to check—no more guessing if you’re about to run out mid-ride. The multiple mounting options are flexible, letting you attach it on your handlebar, helmet, or even under a camera.
Overall, the RN 400 feels like a reliable, high-quality choice for daily commuting or urban riding. It’s simple to operate, safe in bad weather, and offers enough brightness for most night rides.
The locking feature and waterproof design really set it apart from many rivals at this lumen level.
What Features Should You Look for in a 400 Lumen Bike Light?
When searching for the best 400 lumen bike light, consider the following features:
- Brightness Levels: A good bike light should offer multiple brightness settings, including a high mode that reaches 400 lumens for maximum visibility and lower modes for conserving battery life during less demanding rides.
- Beam Pattern: Look for a bike light that provides a well-distributed beam pattern, combining both spot and flood light to illuminate the road ahead and the sides of the path.
- Durability and Weather Resistance: A robust bike light should be constructed from durable materials and have an IP rating that indicates its resistance to water and dust, ensuring it can withstand various weather conditions.
- Battery Life and Charging Options: Consider the battery life of the bike light, including how long it lasts at different brightness settings, and whether it has convenient charging options like USB-C or removable batteries.
- Mounting System: The bike light should come with a reliable and easy-to-use mounting system that allows for quick attachment and detachment from the bike.
Having adjustable brightness levels allows cyclists to adapt to different environments, whether they are navigating busy streets or riding on dark trails. This versatility ensures that the light is functional for various conditions while extending battery life when full brightness is not necessary.
A good beam pattern enhances visibility by illuminating both the distance and the area immediately around the cyclist, helping to spot obstacles and hazards. Different beam patterns can also improve the rider’s peripheral vision, which is critical for safety in urban environments.
Durability is essential for a bike light, as it is often exposed to bumps, vibrations, and harsh weather. A water-resistant design allows cyclists to ride confidently in rain or snow without worrying about damaging their light.
Long battery life is crucial for extended rides, and quick charging options can be a significant advantage for busy cyclists. Knowing the runtime at 400 lumens versus lower settings helps in planning rides and ensuring the light remains functional throughout the journey.
An effective mounting system ensures that the light stays securely in place during rides, while also allowing for easy removal when the bike is parked. Adjustable mounts can fit various handlebars and seat posts, accommodating different bike styles and rider preferences.
How Can a 400 Lumen Bike Light Enhance Your Safety While Riding?
A 400 lumen bike light can significantly enhance your safety while riding by improving visibility and awareness in various conditions.
- Increased Visibility: A 400 lumen output provides a bright beam that makes you more visible to drivers and pedestrians, especially in low-light conditions.
- Wide Beam Pattern: Many 400 lumen bike lights feature a wide beam pattern that illuminates the road ahead while also casting light to the sides, which helps in spotting obstacles.
- Multiple Lighting Modes: These lights often come with various modes such as steady, flashing, and eco, allowing you to adjust the brightness and pattern based on your environment and battery life needs.
- Durability and Weather Resistance: Most 400 lumen bike lights are designed to withstand harsh weather conditions, ensuring reliable performance whether it’s raining or snowing.
- Easy Installation: Many 400 lumen bike lights are designed for quick and easy installation, allowing you to mount them on your bike without the need for special tools.
The bright output of a 400 lumen bike light not only enhances your visibility but also gives you confidence while riding in the dark. Increased visibility means that drivers are more likely to see you, reducing the risk of accidents. The wide beam pattern is essential for navigating uneven terrains and spotting potential hazards early on, allowing for timely reactions.
Having multiple lighting modes is advantageous as you can conserve battery life on longer rides or switch to a more intense setting when cycling through particularly dark areas. Additionally, the durability of these lights ensures that they can withstand impacts and adverse weather conditions, making them reliable companions for any cyclist. The ease of installation means that you can quickly set up and remove the light as needed, adding to its convenience.
Why is Brightness Important for Different Riding Conditions?
Brightness is crucial for different riding conditions because it directly affects visibility and safety for both the cyclist and other road users. A bike light with around 400 lumens provides a balance between sufficient illumination for dark environments and energy efficiency for longer rides.
According to the National Highway Traffic Safety Administration (NHTSA), visibility is a key factor in preventing accidents, particularly at night or in low-light conditions. Research indicates that cyclists using lights that produce at least 300 lumens are significantly more visible to drivers, reducing the likelihood of collisions (NHTSA, 2020).
The underlying mechanism involves the relationship between light intensity and human perception. When riding in poorly lit areas, a brighter light enhances the cyclist’s ability to see obstacles, road signs, and other potential hazards. Additionally, a well-lit cyclist is more easily noticed by motorists, which is crucial in preventing accidents. A 400 lumen light strikes an effective balance, providing enough brightness to illuminate the path ahead without draining the battery too quickly, thus ensuring consistent performance during extended rides.
What Are the Best 400 Lumen Bike Lights Available Today?
The best 400 lumen bike lights available today offer a balance of brightness, durability, and versatility for cyclists.
- Cateye Volt 400: This light is compact, lightweight, and features a powerful beam with multiple modes, including a daytime flash to enhance visibility.
- NiteRider Lumina 400: Known for its robust build and long battery life, this light provides a wide beam pattern and is easily mountable on various handlebars.
- Lezyne Micro Drive 400XL: This light combines a sleek design with a powerful output, offering various output modes and an integrated USB charging system for convenience.
- Bontrager Ion 400: Featuring an easy-to-use design with a focus on visibility, this light is great for both day and night rides, offering a reliable performance in various conditions.
- Light & Motion Urban 400: This light is designed for urban riding, offering a unique side lighting feature for enhanced visibility from all angles and a durable, waterproof housing.
The Cateye Volt 400 is an excellent choice for cyclists looking for a compact solution with versatile lighting modes. It features an easy-to-use mounting system and offers impressive brightness, ensuring you are visible on the road.
The NiteRider Lumina 400 stands out for its durability and long-lasting battery life, making it ideal for longer rides. It also provides a broad beam pattern that illuminates a wider area, enhancing safety on dark paths.
The Lezyne Micro Drive 400XL is favored for its sleek design and efficient USB charging capability. It offers multiple output modes, allowing cyclists to choose the appropriate setting based on their riding environment.
Bontrager Ion 400 is designed with visibility in mind, making it a reliable choice for both day and night riding. Its user-friendly design and bright output help ensure that cyclists can be seen by others on the road.
Light & Motion Urban 400 is specifically tailored for urban environments, featuring side lights that increase visibility at intersections. Its robust, waterproof design ensures it can withstand various weather conditions while providing reliable illumination.
How Do You Install a 400 Lumen Bike Light Correctly?
To install a 400 lumen bike light correctly, you need to follow a few essential steps to ensure optimal performance and safety.
- Choose the Right Location: Select a position on your handlebars or seat post where the light can be securely mounted and provides maximum visibility.
- Secure the Mounting Bracket: Use the provided mounting bracket and attach it to the bike frame, ensuring it is tightened properly and won’t move while riding.
- Attach the Light: Slide the 400 lumen bike light into the mounting bracket, making sure it clicks into place and is oriented for optimal beam direction.
- Connect the Power Source: If your light is rechargeable, connect it to the charger or ensure fresh batteries are installed if it uses disposable ones.
- Test the Light: Before heading out, test the light to confirm it is functioning correctly and adjust the angle if necessary for better illumination.
Choosing the Right Location involves selecting a spot that maximizes visibility without obstructing your view or control of the bike. Common locations include the center of the handlebars or directly above the front wheel on the frame.
Securing the Mounting Bracket entails using the hardware provided with the bike light to ensure it is firmly attached to prevent it from falling off during rides. It’s important to check that the bracket is compatible with your bike’s geometry.
Attaching the Light requires sliding the bike light into the bracket until it clicks, ensuring the light is stable and won’t shift while cycling. Positioning the light slightly tilted down can help prevent blinding oncoming traffic.
Connecting the Power Source is vital for ensuring your light is ready for use; if using a rechargeable model, ensure it has been charged fully before your ride, while disposable battery models should have fresh batteries to avoid dim lighting.
Testing the Light is crucial to confirm that it works correctly, allowing you to adjust it for optimal beam spread and focus. This step ensures you’re prepared for any lighting conditions you may encounter on your ride.
What Are the Key Differences Between Front and Rear 400 Lumen Bike Lights?
| Feature | Front Light | Rear Light |
|---|---|---|
| Brightness | Typically 400 lumens for visibility in dark conditions. | Also 400 lumens, focused on making the rider noticeable from behind. |
| Beam Pattern | Wide beam for illuminating the road ahead. | Narrow beam aimed at increasing visibility to others. |
| Mounting Location | Mounted on the handlebars for forward visibility. | Mounted on the seat post or rear of the bike. |
| Visibility | Helps cyclists see the path and be seen by oncoming traffic. | Alerts vehicles and pedestrians from behind for safety. |
| Battery Life | Typically lasts 6-12 hours depending on mode. | Typically lasts 4-10 hours depending on mode. |
| Weight | Generally heavier due to more features. | Lighter, focusing on basic functionality. |
| Water Resistance | Often rated IPX4 or higher for rain protection. | Usually rated IPX4 for water resistance. |
| Price Range | $30 – $100 depending on features. | $20 – $70 depending on features. |
| Typical Usage | Used for night rides and low-light conditions. | Essential for urban riding and commuting. |
How Do You Maintain Your 400 Lumen Bike Light for Optimal Performance?
To maintain your 400 lumen bike light for optimal performance, consider the following key practices:
- Regular Cleaning: Keeping your bike light clean is essential for ensuring maximum brightness and functionality.
- Battery Care: Proper battery maintenance can significantly extend the lifespan of your bike light.
- Storage Conditions: Storing your bike light correctly when not in use helps prevent damage and degradation.
- Check Connections: Regularly inspecting and securing connections ensures consistent power supply and prevents flickering.
- Update Firmware: If your bike light has firmware updates available, keeping it up to date can enhance performance and introduce new features.
Regular Cleaning: Dust, dirt, and moisture can accumulate on your bike light, affecting its performance and brightness. Use a soft cloth to wipe the lens and housing, and make sure to remove any debris that might obstruct the light’s output.
Battery Care: For rechargeable bike lights, it’s important to follow the manufacturer’s guidelines for charging cycles. Avoid letting the battery completely drain before recharging, as this can reduce battery capacity over time, and ensure that you are using the correct charger to prevent damage.
Storage Conditions: When not in use, store your bike light in a cool, dry place away from direct sunlight and extreme temperatures. This helps to protect the electronic components and batteries from heat damage and moisture that can lead to corrosion.
Check Connections: Loose or corroded connections can lead to intermittent power issues, resulting in flickering or a complete light failure. Regularly inspect the mounting and wiring, and clean any corrosion with a suitable contact cleaner to ensure a stable connection.
Update Firmware: Some modern bike lights come equipped with software that can be improved through firmware updates. Check the manufacturer’s website periodically for updates, as these can fix bugs, enhance performance, and sometimes add new features that improve your riding experience.
Related Post: