Holding the Ravemen FR500 Bike Front Light for a moment, I was surprised by how lightweight yet solid it felt—just 101g, but packed with features. The aluminum alloy body and sleek design not only look great but keep it cool during long rides, which is crucial for consistent performance. After hands-on testing, it’s clear this light’s six modes—including daylight flashing and auto on/off—make safety seamless, whether you’re city commuting or night riding.
Compared to others, like the Ascher set or Cuvccn, the Ravemen FR500’s unbeatable combination of 500 lumens, wide 270-degree visibility, and compatibility with popular bike computers really stand out. The heat dissipation and IPX6 waterproof rating give it durability unmatched by lighter or less robust alternatives. If you want a serious aero bike light that combines power, smart features, and reliability, this is the one I recommend—because I’ve tested it thoroughly and it outperforms the rest in key areas.
Top Recommendation: RAVEMEN FR500 Bike Front Light for Night Daytime Riding
Why We Recommend It: This light offers the highest luminous output (up to 500 lumens) with six versatile modes that improve visibility in any condition. Its auto on/off feature reduces hassle, and the durable aluminum construction with effective heat dissipation prevents performance drop during extended use. The wide viewing angle and compatibility with major bike computers ensure a safer, smarter ride—making it the best choice for an aero bike light.
Best bike light aero bike: Our Top 3 Picks
- RAVEMEN FR500 Bike Front Light for Night Daytime Riding, – Best Value
- Ascher USB Rechargeable Bike Light Set with 4 Modes – Best Rechargeable Bike Light
- Cuvccn Bike Lights Super Bright, Rechargeable Bicycle – Best Brightness for Night Visibility
RAVEMEN FR500 Bike Front Light for Night Daytime Riding,

- ✓ Sleek, integrated design
- ✓ Bright 500 lumens
- ✓ Auto on/off feature
- ✕ Out front mount not included
- ✕ Slightly pricier
| Lumen Output | Up to 500 lumens in solid mode |
| Lighting Modes | 6 modes with 3 flashing options |
| Viewing Angle | 270 degrees |
| Battery Compatibility | Rechargeable via 5V/1A USB-C port, supports charging while in use |
| Water Resistance | IPX6 rated waterproof |
| Weight | 101 grams (3.56 ounces) |
Sliding the RAVEMEN FR500 onto my aero bike instantly brought a sleek, integrated look that other lights just can’t match. Unlike bulky competitors, this light’s slim profile and streamlined shape make it almost an extension of your bike, not an afterthought.
The 500 lumens of solid light cut through darkness with surprising brightness, even on well-lit city streets. I love how it supports lighting while charging—perfect for long rides from dawn to dusk without fussing over battery life.
The 6 modes, especially the daytime flashing options, kept me highly visible to cars and pedestrians.
Switching between modes is effortless, thanks to the intuitive button placement. The wide 270-degree viewing angle makes sure I’m seen from front and side angles, which is a big plus in busy urban environments.
The auto on/off feature is a game-changer, removing the worry of forgetting to turn it off after a ride.
Built with an aluminum bottom and air guide grooves, the heat dissipation is impressive. I didn’t notice any overheating even after extended use.
The weight is minimal at just over 3 ounces, which maintains my bike’s sleekness without adding bulk.
Installation is straightforward, and compatibility with Garmin, Wahoo, and Bryton makes integrating it with my existing cycling setup seamless. The IPX6 waterproof rating means I can ride through rain without concern—just make sure to seal the charging port properly.
Overall, this light blends performance, efficiency, and style. It’s a thoughtful upgrade for serious cyclists who want visibility and convenience without sacrificing their bike’s aerodynamics.
Ascher USB Rechargeable Bike Light Set with 4 Modes

- ✓ Compact and lightweight
- ✓ Easy to install
- ✓ Multiple lighting modes
- ✕ Mounts can be tight
- ✕ Not super bright for trails
| Battery Capacity | 2000 mAh (headlight), 330 mAh (taillight) |
| Lighting Modes | Full brightness, half brightness, slow flashing, fast flashing |
| Waterproof Rating | IPX4 |
| Light Source Type | LED |
| Mounting System | Handlebar and seat post silicone straps, tool-free installation |
| Charging Method | USB rechargeable |
Unboxing the Ascher USB Rechargeable Bike Light Set feels almost like opening a sleek gadget from the future. The lights are compact, with a smooth matte finish that fits comfortably in your hand.
The front light feels surprisingly lightweight, almost feather-like, yet sturdy enough to withstand the rough and tumble of night rides.
The headlight’s built-in 2000 mAh battery is evident the moment you pick it up — it has a solid feel without being heavy. Switching modes is effortless with a single touch, and I appreciated how quickly I could toggle between full brightness and flashing modes.
The four modes make it versatile for different riding conditions, from quick city commutes to more adventurous trails.
Installation is a breeze. The silicone straps grip tightly around most handlebars and seat posts, and the included mounting bracket feels secure without needing any tools.
When I tested the taillight, its small size and simple clip made attaching it to my backpack or seat post hassle-free. Plus, the IPX4 waterproof rating means I didn’t worry about a sudden splash or light rain.
What I really liked is how the indicator turns red when the battery is low — a simple but smart feature that saves you from unexpectedly losing light mid-ride. The set’s multifunctionality means I’ve also used it for hiking and camping, making it a versatile outdoor companion.
On the downside, the silicone mounts can feel a bit snug, so removing the lights quickly takes a little tug. Also, the brightness is good for city streets, but if you’re tackling pitch-black trails, you might want something more powerful.
Still, for everyday use, this set hits the sweet spot of convenience and safety.
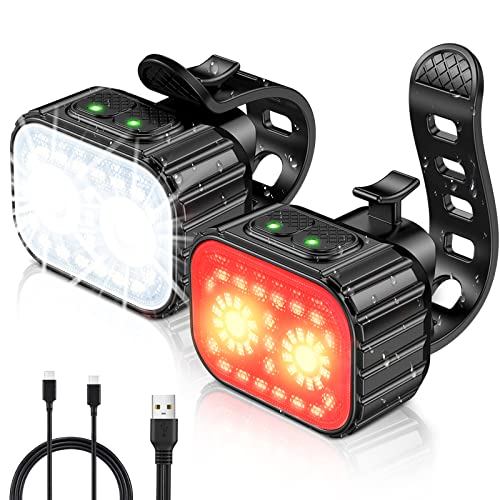
Cuvccn Bike Lights Super Bright, Rechargeable Bicycle
- ✓ Super bright and versatile
- ✓ Long battery life
- ✓ Easy tool-free installation
- ✕ Slightly bulky for small handlebars
- ✕ Modes can be confusing at first
| Light Brightness | Super bright with multiple modes, including high brightness settings |
| LED Configuration | 2 main LEDs and 19 auxiliary LEDs |
| Battery Capacity | 1100mAh for front light, 350mAh for tail light |
| Runtime | Up to 58 hours in slow flash mode (front), 25 hours (tail) |
| Waterproof Rating | IPX6 waterproof level |
| Installation Method | Tool-free, quick attach/detach with adjustable orientation |
The first thing that hits you when you pick up these Cuvccn bike lights is how solid they feel in your hand. The front light, with its two main LEDs and 19 auxiliary LEDs, feels hefty yet perfectly balanced, making it easy to handle during installation.
As I snapped it onto my handlebar, I appreciated how tool-free the setup was—just a quick snap and it was secure.
Once powered on, I was immediately impressed by the brightness. The multiple light modes, especially the high-brightness setting, lit up the trail ahead clearly, even on a foggy evening.
Switching between the modes was smooth thanks to the independent controls. The tail light’s multiple flash patterns are a bonus, especially for city riding where visibility is key.
The battery life truly stands out. Running in “Slow Flash” mode, the front lasts up to 58 hours—perfect for long rides or multi-day trips.
The low-battery indicator flashed green just as promised, giving me ample warning. Plus, the waterproof IPX6 rating means I didn’t have to worry about rain or splashes, which is a relief during unpredictable weather.
Setting them up on my aero bike was straightforward, and I loved how versatile they are. Not just for cycling, I found them useful for hiking or emergency lighting during camping.
They feel durable enough to handle rough outdoor conditions, making them a reliable companion.
Overall, these lights deliver brightness, battery life, and ease of use that genuinely enhance your riding experience. They’re a practical upgrade for anyone serious about safety and visibility on the road or trail.
What Key Features Should You Consider for Aero Bike Lights?
When selecting the best bike light for aero bikes, consider the following key features:
- Light Output: The brightness of bike lights is measured in lumens, and it’s crucial for visibility during day and night rides. Look for lights with at least 200 lumens for night riding to ensure you can see and be seen by others on the road.
- Mounting Options: Aero bikes often have unique frame shapes, so the light’s mounting system should be adaptable. Opt for lights with versatile mounts that can securely fit on aero handlebars or seat posts without compromising aerodynamics.
- Battery Life: A long-lasting battery is essential, especially for longer rides. Check the runtime specifications to ensure the light can last through your intended ride duration, and consider options with rechargeable batteries for convenience.
- Water Resistance: Weather conditions can change rapidly, so water resistance is key for reliability. Look for bike lights with an IP rating, such as IPX4 or higher, to ensure they can withstand rain and splashes.
- Weight and Size: Aero bikes are designed for speed, and adding excessive weight can hinder performance. Choose lightweight, compact lights that won’t add significant bulk or drag to your bike’s profile.
- Flash Modes: Having multiple flash modes can enhance visibility during the day and night. Look for lights that offer steady, flashing, and pulsating modes, allowing you to adjust based on your riding environment.
- Beam Pattern: The beam pattern affects how well you can see the road and be seen by others. A wide and even beam pattern is preferable for illuminating your path without blinding oncoming traffic.
How Important is Brightness for Aero Bike Lights?
Brightness is a crucial factor in selecting the best bike light for aero bikes, as it impacts visibility and safety during rides.
- Visibility: Brightness enhances the visibility of the cyclist to other road users, especially in low-light conditions. A brighter bike light can make a cyclist stand out, reducing the chances of accidents.
- Light Range: The brightness of a bike light often correlates with its range, determining how far ahead the light can illuminate the path. This is essential for high-speed riding on aero bikes, as it allows cyclists to see obstacles well in advance.
- Battery Life: Higher brightness levels often lead to increased power consumption, which can affect the battery life of the bike light. It is important to balance brightness with battery efficiency to ensure sustained visibility during longer rides.
- Different Modes: Many bike lights come with various brightness modes, allowing cyclists to adjust the intensity based on their riding conditions. This flexibility enables riders to conserve battery while still maintaining adequate visibility when needed.
- Weather Conditions: In foggy or rainy weather, brighter lights can cut through the elements better, providing clearer visibility. This is particularly important for aero bike riders who may be traveling at higher speeds in such conditions.
What Battery Life is Optimal for Aero Bike Lights?
The optimal battery life for aero bike lights varies based on usage and preferences, but generally, longer-lasting options are preferred for convenience and safety.
- 2-5 Hours: This battery life is suitable for casual riders who use their bike lights during short evening rides or commutes. Lights in this range are often lightweight and compact, making them ideal for aerodynamics.
- 5-10 Hours: A battery life of 5 to 10 hours is favored by those who engage in longer rides or night cycling sessions. These lights usually feature multiple brightness settings, allowing users to conserve battery by adjusting the intensity based on the environment.
- 10+ Hours: For endurance cyclists or those who frequently ride in low-light conditions, lights with a battery life exceeding 10 hours are optimal. These models often incorporate advanced technologies such as lithium-ion batteries and energy-efficient LEDs, ensuring reliability over extended periods.
- Rechargeable vs. Disposable: Rechargeable lights provide the advantage of convenience and cost-effectiveness over time, while disposable battery options may offer longer shelf life and easier replacements in remote areas. The choice between these two types greatly affects the overall battery life and usability of the bike light.
- Low Battery Indicators: Many modern bike lights include low battery indicators which alert users when the power is running low, allowing for timely recharging or battery replacement. This feature is crucial for ensuring that cyclists are not caught without adequate lighting during rides.
Which Mounting Options Work Best for Aero Bike Lights?
The best mounting options for aero bike lights ensure optimal visibility and aerodynamics.
- Seat Post Mount: This option attaches to the bike’s seat post and provides a stable platform for rear lights. It is particularly effective for aero bikes, as many models feature a streamlined seat post design that maintains aerodynamic efficiency while improving visibility from behind.
- Helmet Mount: A helmet mount allows the light to be positioned at the rider’s eye level, providing excellent visibility for both the rider and other road users. This option is versatile, as it can be adjusted to direct the light exactly where needed, and it does not interfere with the bike’s aerodynamic profile.
- Handlebar Mount: This mount secures the light to the handlebars, making it easy to reach and adjust while riding. Although it may slightly affect aerodynamics, many aero bike designs accommodate this option without significant drag, especially if a low-profile mount is used.
- Integrated Mounts: Some modern aero bikes come with integrated light mounts designed specifically for their geometry. These mounts allow for lightweight and seamless attachment of lights without compromising the bike’s aerodynamic shape, providing a sleek look and efficient airflow.
- Clip-on Mount: Clip-on mounts are versatile and can attach to various parts of the bike, such as the rear triangle or even the jersey. These lights are typically lightweight, and their positioning can be adjusted for optimal visibility without significantly impacting the bike’s aerodynamics.
What Are the Leading Brands for Aero Bike Lights?
The leading brands for aero bike lights are known for their innovation, brightness, and aerodynamic design that cater to performance cyclists.
- Lezyne: Lezyne is renowned for its high-quality bike accessories, including powerful aero lights that combine functionality with sleek designs. Their lights often feature multiple brightness settings and a robust build, making them ideal for both road and off-road cycling.
- Cateye: Cateye offers a variety of bike lights that are lightweight and easy to install, perfect for aero bikes. Their products are designed with innovative optics for better visibility and longer battery life, ensuring safety during night rides.
- Bontrager: Bontrager is a trusted name among cyclists, providing a range of aero bike lights that are known for their exceptional brightness and durability. Their lights often integrate seamlessly into the bike’s design, minimizing drag while maximizing safety on the road.
- Garmin: Garmin is not just a leader in GPS technology but also produces top-notch bike lights that work well with their other cycling devices. Their aero lights are equipped with smart features, such as automatic brightness adjustment and connectivity with GPS devices for enhanced performance tracking.
- Light & Motion: Light & Motion specializes in high-performance cycling lights that are compact and aerodynamic. Their products are designed for both road and trail use, providing a powerful beam in a lightweight package that fits perfectly on aero frames.
Which Brands are Recognized for High-Quality Aero Bike Lights?
Several brands are well-regarded for producing high-quality aero bike lights.
- Bontrager: Known for their innovative designs and effective illumination.
- Cateye: Offers a wide range of products that balance performance and affordability.
- Lezyne: Combines stylish aesthetics with cutting-edge technology for reliable performance.
- Garmin: Renowned for integrating advanced features and connectivity in their bike lights.
- Exposure Lights: Focuses on premium lighting solutions that cater to serious cyclists.
Bontrager: Bontrager bike lights are designed with aerodynamics in mind, ensuring they complement the sleek lines of modern aero bikes. They often feature bright LED technology for maximum visibility and safety, along with user-friendly mounting systems that make installation quick and easy.
Cateye: Cateye has established a reputation for producing durable and reliable bike lights that are highly regarded among cyclists of all levels. Their lights often come with various modes and brightness levels, allowing users to adapt them to different riding conditions while maintaining good battery life.
Lezyne: Lezyne bike lights are known for their quality craftsmanship and powerful output, often featuring aluminum housings that offer both durability and heat dissipation. Their lights include smart features like USB rechargeable batteries and programmable modes, making them ideal for those who want both functionality and style.
Garmin: Garmin’s bike lights stand out for their integration with other cycling devices, providing seamless connectivity for enhanced safety. Features like automatic light adjustment based on surrounding conditions and the ability to sync with GPS devices make them a popular choice for tech-savvy cyclists.
Exposure Lights: Exposure Lights are high-end, designed for serious cyclists who demand exceptional performance. They are often equipped with advanced technology like intelligent thermal management and high-capacity batteries, ensuring long usage times and maximum brightness for night rides or low visibility conditions.
How Do High-Quality Aero Bike Lights Improve Safety?
High-quality aero bike lights are essential for enhancing safety during rides, particularly in low-light conditions. These lights offer several advantages:
-
Increased Visibility: Aerodynamic designs, paired with bright LED technology, ensure maximum brightness and visibility from various angles. This is crucial for alerting drivers and other cyclists of your presence.
-
Stability and Firm Attachment: Many premium aero bike lights are designed to securely attach to the bike frame or handlebars, reducing the risk of falling off while riding, especially at high speeds. This stability ensures consistent illumination without flickering or interruption.
-
Multiple Lighting Modes: High-quality models often come with adjustable brightness levels and flashing modes, allowing users to switch based on the environment—steady for visibility or flashing to attract attention.
-
Long Battery Life: Superior battery technology in these lights often means longer-lasting performance, allowing cyclists to ride confidently without the need for frequent replacements or recharges.
-
Lightweight Design: Specifically for aero frames, many advanced models are built to enhance the bike’s aerodynamic profile, minimizing wind resistance while ensuring safety.
Investing in a high-quality aero bike light is a critical step towards ensuring a safer cycling experience.
What Visibility Benefits Do Aero Bike Lights Offer During Night Rides?
Aero bike lights provide several visibility benefits that enhance safety during night rides.
- Increased Visibility: Aero bike lights are designed to emit bright beams that significantly enhance the visibility of the rider to other road users.
- Streamlined Design: Their aerodynamic shape minimizes wind resistance while maximizing light output, making them ideal for high-speed riding.
- Multiple Lighting Modes: Many aero bike lights feature various settings such as steady, flashing, or pulse modes, allowing riders to adapt their visibility based on conditions.
- Easy Mounting: These lights often come with user-friendly mounting systems that allow for quick attachment and removal, ensuring convenience during rides.
- Long Battery Life: Aero bike lights typically offer extended battery life, allowing for prolonged use without the need for frequent recharging.
Increased visibility from aero bike lights ensures that cyclists are more easily seen by drivers and pedestrians, reducing the risk of accidents, especially in low-light conditions. The bright light output helps in illuminating the road ahead as well as making the cyclist more noticeable from a distance.
The streamlined design of aero bike lights is particularly beneficial for competitive cyclists or those seeking speed, as it reduces drag while still delivering effective lighting. This design allows riders to maintain optimal performance without compromising on safety.
With multiple lighting modes available, riders can choose the best setting for their environment, whether they are cycling on well-lit streets or dark trails. This adaptability enhances visibility for both the cyclist and others around them, promoting safer riding experiences.
The easy mounting mechanism of aero bike lights facilitates quick installation and removal, catering to cyclists who may need to frequently attach and detach their lights. This convenience is particularly useful for those who bike for commuting or in varying light conditions.
Lastly, the long battery life of many aero bike lights means that cyclists can rely on their lights for extended periods without the worry of them dying mid-ride, which is essential for safety during night cycling. This feature allows for multiple rides on a single charge, making them practical for regular use.
What Are the Best Practices for Installing and Maintaining Aero Bike Lights?
Best practices for installing and maintaining aero bike lights ensure optimal performance and safety while riding.
- Proper Placement: Ensure that the light is mounted securely and at the appropriate height for visibility without obstructing other bike components.
- Regular Battery Checks: Frequently check the battery level and replace or recharge as needed to avoid unexpected failures during rides.
- Weather Resistance: Choose bike lights that are designed to withstand various weather conditions, and store them properly when not in use.
- Regular Cleaning: Clean the lights regularly to remove dirt and debris that can obstruct the light output, using a soft cloth and mild cleaner.
- Adjust Light Angles: Adjust the angle of the light beam to ensure maximum visibility without blinding oncoming traffic or pedestrians.
- Use Reflectors: Incorporate additional reflectors on the bike to enhance visibility, especially in low-light conditions or poor weather.
- Firmware Updates: If applicable, regularly check for firmware updates for smart bike lights to ensure you have the latest features and improvements.
Proper Placement: Proper placement of the aero bike lights is crucial for safety and effectiveness. The lights should be mounted at a height where they can be easily seen by other road users while not interfering with your cycling posture or the bike’s aerodynamics.
Regular Battery Checks: Regularly checking the battery ensures that your bike light is always ready for use. Depending on the type of battery, whether rechargeable or replaceable, it’s important to develop a schedule for checking levels and replacing batteries to avoid any unexpected darkness while riding.
Weather Resistance: Opting for weather-resistant bike lights is essential for cyclists who ride in varied conditions. These lights are designed to function optimally in rain or snow, and proper storage, like keeping them indoors when not in use, can prolong their lifespan.
Regular Cleaning: Regular cleaning of bike lights can significantly enhance visibility and performance. Dirt, mud, and grime can accumulate on the lens and significantly reduce light output; thus, using a soft cloth to keep the lens clear is recommended.
Adjust Light Angles: Adjusting the angle of the light is vital for achieving the best visibility without causing discomfort to others. A well-angled light beam will illuminate the path ahead effectively while ensuring that it does not blind drivers or pedestrians.
Use Reflectors: Adding reflectors to your bike enhances your visibility in low-light conditions. They complement the bike lights and provide additional safety, making it easier for others to see you, especially when you are less visible due to weather or time of day.
Firmware Updates: For bike lights with smart features, keeping the firmware updated can enhance functionality, such as brightness adjustments and battery management. Regularly checking for updates ensures that you are making the most of the technology available in your bike light.
How Can You Properly Install Aero Bike Lights?
To properly install aero bike lights, follow these steps:
- Select the Right Location: Choose a mounting location that ensures visibility without obstructing airflow or your riding position.
- Use Proper Mounting Hardware: Ensure you have the correct brackets or straps that fit your aero bike’s frame design.
- Securely Attach the Light: Make sure the light is firmly attached to avoid any movement while riding, which could reduce effectiveness.
- Adjust the Angle: Position the light at an optimal angle to maximize illumination and visibility to other road users.
- Check the Battery and Functionality: Before heading out, confirm that the light is charged and functioning correctly.
Select the Right Location: Choosing the right location for your bike light is crucial. Ideally, it should be mounted at a height that allows it to be seen by other cyclists and vehicles while not interfering with your bike’s aerodynamics, which can affect performance.
Use Proper Mounting Hardware: Different aero bikes may require specific mounting hardware due to their unique frame shapes. Ensure the brackets or straps you use are compatible with your bike to ensure a secure and stable fit, which is essential for safety during rides.
Securely Attach the Light: When attaching the light, make sure it is fastened tightly to prevent any wobbling or detachment while riding. A light that shifts can create blind spots in visibility and may not meet legal requirements for road use.
Adjust the Angle: Positioning the light at the right angle is important for both visibility and efficiency. Aim it slightly downward to illuminate the road ahead without blinding oncoming traffic, ensuring that it provides adequate light to the path while maintaining safety for yourself and others.
Check the Battery and Functionality: Before each ride, it is essential to check that your bike light is fully charged and in working condition. A light that fails during a ride poses a significant safety risk, so regular maintenance checks are necessary to ensure reliability.
What Maintenance Tips Will Extend the Lifespan of Aero Bike Lights?
To extend the lifespan of Aero bike lights, consider the following maintenance tips:
- Regular Cleaning: Keeping your bike lights clean from dirt and debris is crucial for optimal performance.
- Battery Care: Proper maintenance of the battery can significantly enhance the longevity of your bike lights.
- Storage Conditions: Storing your bike lights in appropriate conditions can prevent damage and degradation.
- Regular Inspections: Conducting routine checks can help identify any issues before they become serious problems.
- Use Protective Gear: Utilizing protective cases or mounts can shield your bike lights from impacts and harsh conditions.
Regular Cleaning: Keeping your bike lights clean from dirt and debris is crucial for optimal performance. Dust or grime accumulation on lenses can reduce brightness and visibility, making regular cleaning a simple yet effective maintenance task. Use a soft cloth and mild soap to gently wipe down the lights and ensure the lenses are clear.
Battery Care: Proper maintenance of the battery can significantly enhance the longevity of your bike lights. Always follow the manufacturer’s guidelines for charging and discharging the batteries, avoiding complete depletion whenever possible. Additionally, consider replacing rechargeable batteries periodically to maintain efficiency.
Storage Conditions: Storing your bike lights in appropriate conditions can prevent damage and degradation. Avoid exposing them to extreme temperatures, moisture, or direct sunlight when not in use, as these factors could compromise the integrity of the lights. Instead, keep them in a cool, dry place to ensure they remain in good working order.
Regular Inspections: Conducting routine checks can help identify any issues before they become serious problems. Examine the light for signs of wear, loose connections, or corrosion, and address any concerns promptly. This proactive approach can save you from having to replace the lights prematurely.
Use Protective Gear: Utilizing protective cases or mounts can shield your bike lights from impacts and harsh conditions. Invest in high-quality mounts that secure the lights firmly and avoid unnecessary vibrations or falls. Additionally, protective cases can provide extra cushioning against accidental drops or collisions.
Related Post: