Before testing this spray paint, I never realized how much a poor finish or quick fading could ruin a bike’s look. When I gave Spray.Bike Multi-Use Acrylic Spray Paint 400ml a try, I was surprised by how smoothly it covered curves and angles—no drips, just an even matte finish in minutes. Its dry powder coating made application simple and mess-free, even on rough surfaces.
What really impressed me is its durability. After outdoor riding, the vibrant color stayed sharp without peeling or fading, thanks to the high-quality acrylic formula. Plus, it’s eco-friendly, low odor, and quick-drying—making DIY projects stress-free. I’ve tested other paints with less resistance to weather or chipping, but this one holds up well over time. For a bike that stands out with urban style and lasts outdoors, I recommend the Spray.Bike Multi-Use Acrylic Spray Paint 400ml as the ultimate choice.
Top Recommendation: Spray.Bike Multi-Use Acrylic Spray Paint 400ml
Why We Recommend It: This paint offers superior coverage with minimal mess thanks to its dry powder coating. It dries in 10 minutes, provides a durable matte finish, and resists peeling, fading, and scratches—crucial for BMX bikes subjected to outdoor elements. Compared to others, it combines ease of use and long-lasting quality while being eco-friendly, making it the best value and performance choice.
Best spray paint for bmx bike: Our Top 3 Picks
- Spray.Bike Multi-Use Acrylic Spray Paint 400ml – Best for DIY projects
- Spray.Bike Metal Primer, Rust & Corrosion Protection, 400ml – Best spray paint for metal surfaces
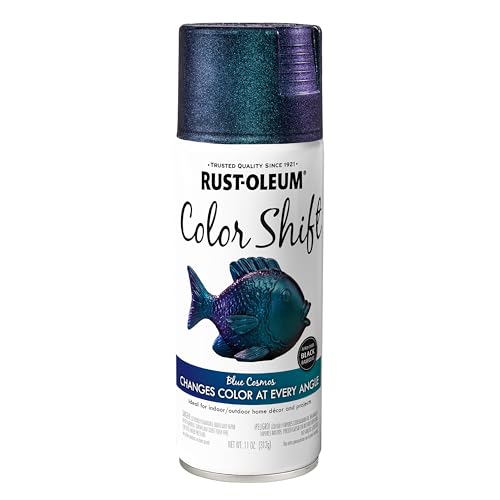
- Rustoleum Color Shift Spray Paint, 11 ounce, Cosmos Blue – Best spray paint for bike frame
Spray.Bike Multi-Use Acrylic Spray Paint 400ml

- ✓ Easy to use and quick-drying
- ✓ Matte finish with vibrant colors
- ✓ Weather and scratch resistant
- ✕ Limited color options
- ✕ May require multiple coats
| Volume | 400ml per can |
| Application Surface | Non-porous surfaces including metals and plastics |
| Drying Time | Approximately 10 minutes for a single coat |
| Finish | Matte |
| Durability | Resistant to peeling, fading, abrasion, weather, and scratches |
| Color Options | 24 shades in the London Collection |
The first time I spray this on my BMX frame, I was surprised by how smooth it went on. No splatters or drips—just a consistent, matte coat that instantly made my bike look like it had been professionally painted.
The spray feels light and even, making it easy to cover curved and angled surfaces without missing spots.
What really stands out is how quickly it dries—just about 10 minutes, and it’s ready for a second coat if needed. I tested it on both metal and plastic parts, and it adhered perfectly without any peeling or fading after a few weeks of outdoor use.
The color payoff is vibrant, yet the finish remains matte, giving my bike a sleek, urban look. I also appreciate the low odor; I didn’t need to worry about strong fumes while working inside my garage.
Plus, the spray’s high-quality acrylic formula feels durable—resisting scratches and weathering well over time.
One thing to keep in mind: the spray’s consistency is different from typical wet paints. It’s dry powder coating, so there’s less mess and fewer drips.
That makes it a real game-changer for DIYers who want professional results without the hassle. Overall, it’s an easy, quick, and eco-friendly way to customize your bike with designs that last.
Spray.Bike Metal Primer, Rust & Corrosion Protection, 400ml

- ✓ Long-lasting rust protection
- ✓ Smooth, even coverage
- ✓ Quick-drying formula
- ✕ Requires good ventilation
- ✕ One coat might not be enough for heavy rust
| Coverage | Provides excellent coverage with a smooth, even finish |
| Drying Time | Dries in approximately 30 minutes |
| Application Method | Spray from a distance of 8 inches, requires only 1 coat |
| Suitable Surfaces | Bare metal, including aluminum, steel, stainless steel, and titanium |
| Volume | 400ml per can |
| Adhesion & Durability | Strong adhesion with chip-resistant, long-lasting protection against rust and corrosion |
While prepping my BMX frame, I unexpectedly found myself wrestling with rust spots—until I remembered I had this Spray.Bike Metal Primer. I sprayed a light coat from about 8 inches away, and honestly, I was surprised by how smooth and even the coverage was right out of the can.
The primer dried in just around 30 minutes, with no fuss, no need for heat treatment or multiple coats. It felt thick enough to cover rough patches but still easy to spray without drips or runs.
The finish was noticeably durable, with a chip-resistant layer that held up even after a few rough rides on gravel.
What really sold me was how well it adhered to the raw metal of my frame—no peeling or flaking after a couple of weeks. Plus, the fact that it works on aluminum, steel, and titanium makes it super versatile for different bike builds.
The spray’s acrylic formula offers a nice, matte surface that’s perfect for the next step: color.
Using this primer, I felt more confident about my paint job lasting through rain, mud, and sweat. It’s straightforward, quick, and effective—ideal for anyone who wants a professional look without the hassle.
If you’re tired of rust eating away at your bike’s frame, give this a shot. It’s a game-changer for DIY bike projects.
Rustoleum Color Shift Spray Paint, 11 ounce, Cosmos Blue
- ✓ Vibrant color shift effect
- ✓ Easy to spray and control
- ✓ Fast drying and durable
- ✕ Needs black base for best look
- ✕ Slightly pricey per can
| Surface Compatibility | Wood, metal, and plastic |
| Application Area | Indoor and outdoor surfaces |
| Drying Time | 20 minutes to touch |
| Coverage | 10-12 sq ft per can |
| Color Finish | Cosmos Blue with color-shift effect |
| Application Tips | Apply over a black base coat for best results |
Imagine you’re sprucing up your BMX bike on a sunny Saturday afternoon. You’ve got the Cosmos Blue spray can in hand, and as you spray, you notice how smoothly the paint applies, almost like it’s gliding onto the frame.
This Rustoleum Color Shift spray paint is pretty impressive right from the start. It applies evenly to all surfaces—metal, plastic, even wood if you’re feeling creative.
The color shift effect adds a vibrant, almost holographic look that really makes your bike stand out.
One thing I liked is how easy the spray tip is to use. It’s an any-angle spray, so you can reach tricky spots without hassle.
Plus, the comfort grip makes long sessions less tiring, which is a huge bonus if you’re doing a full bike makeover.
The paint dries quickly—about 20 minutes to the touch—and covers a decent area, around 10-12 square feet per can. For a BMX frame, that’s usually enough, especially if you do a couple of light coats over a black base for that intense color shift.
It’s durable too, withstanding outdoor elements and rough rides. Just remember to prep your surface well and spray in a well-ventilated area.
Overall, this spray gives your bike that eye-catching, professional look without the fuss of more complicated paints.
What Should You Consider When Selecting Spray Paint for a BMX Bike?
When selecting spray paint for a BMX bike, consider the following factors:
- Durability: Look for spray paint that can withstand wear and tear, as BMX bikes are often exposed to rough conditions. High-quality, durable paints resist chipping, scratching, and fading, ensuring that your bike maintains its vibrant appearance over time.
- Finish Type: The finish of the spray paint can significantly affect the look of your bike. Options such as matte, glossy, or satin finishes provide different aesthetics; a matte finish may give a sleek, modern look, while a glossy finish can enhance color vibrancy and shine.
- Application Ease: Consider how easy the spray paint is to apply. Some paints come with features like adjustable nozzles for better control or are designed for smooth application to minimize runs and drips, making the painting process more manageable.
- Drying Time: Fast-drying spray paints can save you time, allowing for quicker layering and finishing. If the paint dries too slowly, it may lead to dust and debris sticking to the surface before it cures, potentially ruining the finish.
- Color Selection: The variety of colors available can impact your choice, as BMX bikes often feature bright, vibrant designs. Ensure the spray paint you choose comes in the colors you want, and consider how these colors might complement or contrast with the bike’s existing components.
- Compatibility: It’s essential to check if the spray paint is compatible with the materials of your BMX bike, such as metal or plastic. Some paints may require specific primers or clear coats, so understanding the compatibility will help achieve the best results without damaging the bike.
- Environmental Safety: Opt for low-VOC or eco-friendly spray paints to minimize harmful emissions. These options are safer for the environment and for you when spraying in less-ventilated areas.
How Important Is Durability in BMX Bike Spray Paint?
Durability is crucial when selecting spray paint for BMX bikes, as it ensures that the paint withstands the wear and tear of riding, weather conditions, and other external factors.
- Weather Resistance: The paint should be able to resist the effects of rain, sun, and temperature fluctuations to prevent fading and peeling. High-quality spray paints often contain UV inhibitors and water-resistant properties that help maintain the vibrant colors and integrity of the finish over time.
- Scratch and Chip Resistance: BMX bikes are subject to rough handling and potentially abrasive surfaces, making it essential for the paint to resist scratches and chips. Durable spray paints typically have tough coatings that provide a protective layer, reducing the likelihood of visible damage from falls or impacts.
- Adhesion: Good adhesion is vital for ensuring that the paint sticks well to the bike’s surface and does not easily flake off. The best spray paints for BMX bikes are formulated to bond effectively with metal and other materials, creating a long-lasting finish that can endure the rigors of biking.
- Flexibility: The paint should remain flexible after application to accommodate the movements and vibrations experienced while riding. Paint that cracks or becomes brittle can lead to premature wear, so selecting a product designed for flexibility is essential for maintaining a fresh appearance.
- Ease of Application: While not directly related to durability, ease of application contributes to achieving a long-lasting finish. Durable spray paints often feature user-friendly designs, such as adjustable nozzles and smooth spraying mechanisms, which help achieve even coverage and reduce the risk of application errors that could compromise durability.
What Color Options Can Enhance Your BMX Bike’s Aesthetics?
Color options that can enhance your BMX bike’s aesthetics include:
- Matte Black: This color offers a sleek and modern appearance that is highly popular among BMX riders. It provides a stealthy look while also being less prone to showing dirt and scratches.
- Glossy Red: A glossy red finish stands out vividly and can give your bike a bold and aggressive look. This color is often associated with speed and excitement, making it a favorite for racers and thrill-seekers.
- Metallic Blue: Metallic blue creates a shimmering effect that catches the light beautifully, adding depth to the bike’s design. It is versatile and can be paired with various decals or accessories for a customized look.
- Neon Green: For those who want to make a statement, neon green is an eye-catching choice that is hard to miss. This color is great for night riding as it enhances visibility and adds a fun, energetic vibe to the bike.
- Pastel Pink: A pastel pink finish can bring a unique and playful touch to your BMX bike. This softer color is perfect for riders looking to express their individuality and can be combined with other pastel colors for a trendy, cohesive look.
- Custom Graffiti: Utilizing custom graffiti art allows for a truly unique design that reflects personal style. This option can incorporate various colors and patterns, transforming your bike into a canvas and making it a conversation starter.
Which Type of Finish Works Best for BMX Bike Spray Paint?
When selecting the best spray paint for a BMX bike, the type of finish plays a crucial role in both aesthetics and durability. Here are the key finishes to consider:
-
Gloss Finish: This type of finish provides a shiny appearance that stands out. It helps to enhance colors and offers better resistance to chips and scratches. Gloss finishes are easier to clean, making them ideal for riders who frequently take their bikes outdoors.
-
Matte Finish: Matte finishes present a more understated look and can absorb light, which can be appealing for custom designs. However, they are usually less durable than gloss finishes and may show scuff marks more readily.
-
Satin Finish: This option strikes a balance between gloss and matte. Satin finishes provide a soft sheen and are less prone to fingerprints and smudges. They also offer moderate durability, making them a popular choice among BMX enthusiasts.
-
Textured Finish: Textured spray paint can add a unique touch to a BMX bike, creating a non-slip surface that aids grip. This finish is often used on frame components and can enhance the bike’s performance in various terrains.
Choose a finish based on your preferred aesthetics and how you use your BMX bike, ensuring that the paint can withstand wear and tear from riding.
How Should You Prepare Your BMX Bike Before Painting?
Preparing your BMX bike for painting involves several essential steps to ensure a smooth finish and durability.
- Clean the Bike: Thoroughly clean your BMX bike to remove dirt, grease, and grime.
- Disassemble Parts: Take apart the components that are not meant to be painted, such as wheels and pedals.
- Sand the Frame: Lightly sand the bike frame to create a rough surface for the paint to adhere better.
- Use Primer: Apply a suitable primer to enhance the paint’s adhesion and longevity.
- Choose the Right Paint: Select the best spray paint for BMX bike frames that is durable and weather-resistant.
- Apply Paint in Layers: Spray paint in thin, even layers to avoid drips and ensure an even coat.
- Let it Cure: Allow adequate drying time between coats and after the final coat to achieve a hard finish.
Cleaning your BMX bike is crucial as it ensures that any contaminants do not interfere with the paint application, which can lead to peeling or bubbling. Use a degreaser and a soft cloth or sponge to scrub all surfaces, followed by rinsing and drying thoroughly.
Disassembling parts of the bike like the wheels, seat, and pedals will protect them from overspray and allow you to focus on painting the frame without obstructions. Make sure to keep track of all the fasteners and components for easy reassembly later.
Sanding the frame lightly will help the new paint adhere better by creating a textured surface. Use fine-grit sandpaper to avoid damaging the bike’s original finish, and be sure to wipe away any dust created during this process.
Applying a primer coat is essential as it not only improves adhesion but also prevents rust from forming under the paint. Choose a primer that is compatible with the type of spray paint you plan to use for the best results.
When choosing the best spray paint for your BMX bike, look for options specifically designed for metal surfaces, which offer durability and protection against the elements. Brands that include UV protection and scratch resistance will help maintain the bike’s appearance over time.
During the painting process, apply the spray paint in thin, consistent layers. This technique prevents drips and runs, ensuring a smooth finish. Multiple thin coats are more effective than one thick coat.
Finally, allow the paint to cure fully after the final coat, as this ensures that the finish is hard and resistant to scratches and wear. Curing time can vary based on the paint used, so refer to the manufacturer’s instructions for optimal results.
What Techniques Ensure a Smooth Application of Spray Paint on a BMX Bike?
To achieve a smooth application of spray paint on a BMX bike, several techniques can be employed.
-
Preparation: Start by thoroughly cleaning the bike frame to remove dirt, grease, and any old paint. Use sandpaper or a wire brush to scuff the surfaces. This helps the new paint adhere better.
-
Primer: Applying a primer specifically suitable for metal surfaces is crucial. This provides a textured surface for the paint, improves adhesion, and enhances durability.
-
Temperature and Environment: Aim to paint in a well-ventilated area with temperatures between 50°F and 90°F (10°C to 32°C). Avoid painting in high humidity, as it can affect drying and finish quality.
-
Spray Technique: Hold the spray can about 6-12 inches away from the surface. Use consistent, sweeping motions to apply thin, even coats. Overlapping strokes can help prevent dripping and uneven coverage.
-
Drying Time: Allow adequate drying time between coats. This prevents runs and ensures a smooth finish. Generally, waiting about 15-30 minutes between coats is ideal.
-
Final Coat and Finish: After achieving the desired coverage, consider applying a clear coat for added protection and gloss.
By following these techniques, a professional-looking finish on a BMX bike can be easily achieved.
How Can You Maintain the Painted Finish on Your BMX Bike?
Maintaining the painted finish on your BMX bike involves several key practices to ensure durability and aesthetics.
- Use High-Quality Spray Paint: Choosing the best spray paint for your BMX bike is crucial for longevity and appearance.
- Regular Cleaning: Keeping your bike clean helps to prevent dirt and grime from damaging the paint.
- Avoiding Harsh Chemicals: Using gentle cleaning solutions can help protect the paint from deterioration.
- Apply Clear Coat: A clear coat can provide an extra layer of protection against scratches and UV rays.
- Store Properly: Storing your bike in a dry, shaded area can prevent paint fading and chipping.
Use High-Quality Spray Paint: Selecting the best spray paint specifically designed for metal surfaces ensures that it adheres well and provides a durable finish. Look for options that are resistant to chipping and fading, as these qualities will help maintain the bike’s appearance over time.
Regular Cleaning: Cleaning your BMX bike frequently with mild soap and water not only keeps it looking good but also removes contaminants that can cause paint damage. A soft cloth or sponge should be used to avoid scratching the surface while cleaning.
Avoiding Harsh Chemicals: Many household cleaners contain strong chemicals that can strip or dull the paint finish on your bike. Opt for pH-neutral or bike-specific cleaning products to ensure the paint remains intact while still effectively removing dirt and grease.
Apply Clear Coat: After painting, applying a clear coat adds an extra layer of protection that can resist scratches and protect against UV damage. This additional coating enhances the paint’s gloss and can prolong its lifespan significantly.
Store Properly: Proper storage is essential for maintaining your bike’s finish. Keeping it in a cool, dry place away from direct sunlight and extreme temperatures can prevent the paint from fading and chipping, ensuring it stays in great condition for longer.
Related Post: